
Pwned Labs VPN
Connection Guide
This guide explains how to connect to your lab, cyber range or bootcamp using the WireGuard **`.conf`**
file you were given. It works on **Windows, macOS, and Linux**, with either a
**GUI app** or the **command line**.
> **This is a split-tunnel VPN.** Only specific **lab domains and resources** are routed through the VPN. These are a defined set of domains and cloud resources hosted in Azure, Google Cloud and AWS that your lab, cyber range or bootcamp needs. It is **not** all traffic to those providers. Everything else (general Azure, Google and AWS sites, YouTube, your email, and the rest of the web) goes out your **normal internet connection** as usual. So your public IP will **not** change for general browsing - that's expected, not a bug.
---
## 0. First - use the right config for your OS
You were given a WireGuard config. There are **two flavors**, and using the wrong
one on Linux will make the tunnel fail silently:
| Your OS | Use the config labeled |
| --- | --- |
| [**Windows**](#1-windows) | Mac/Windows |
| [**macOS**](#2-macos) | Mac/Windows |
| **iOS / Android** | Mac/Windows |
| [**Linux**](#3-linux) (incl. Kali/Ubuntu desktop VMs) | **Linux** |
If you're not sure which one you have, open the `.conf` in a text editor:
- Has a line starting with **`DNS = ...`** -> it's the **Mac/Windows** flavor.
- Has a line starting with **`PostUp = ...`** and **no `DNS =`** -> it's the **Linux** flavor.
If you have the wrong one, ask student support to re-issue the correct flavor (see **Need help?** at the end of this guide).
---
## 1. Windows
### Option A - GUI (recommended)
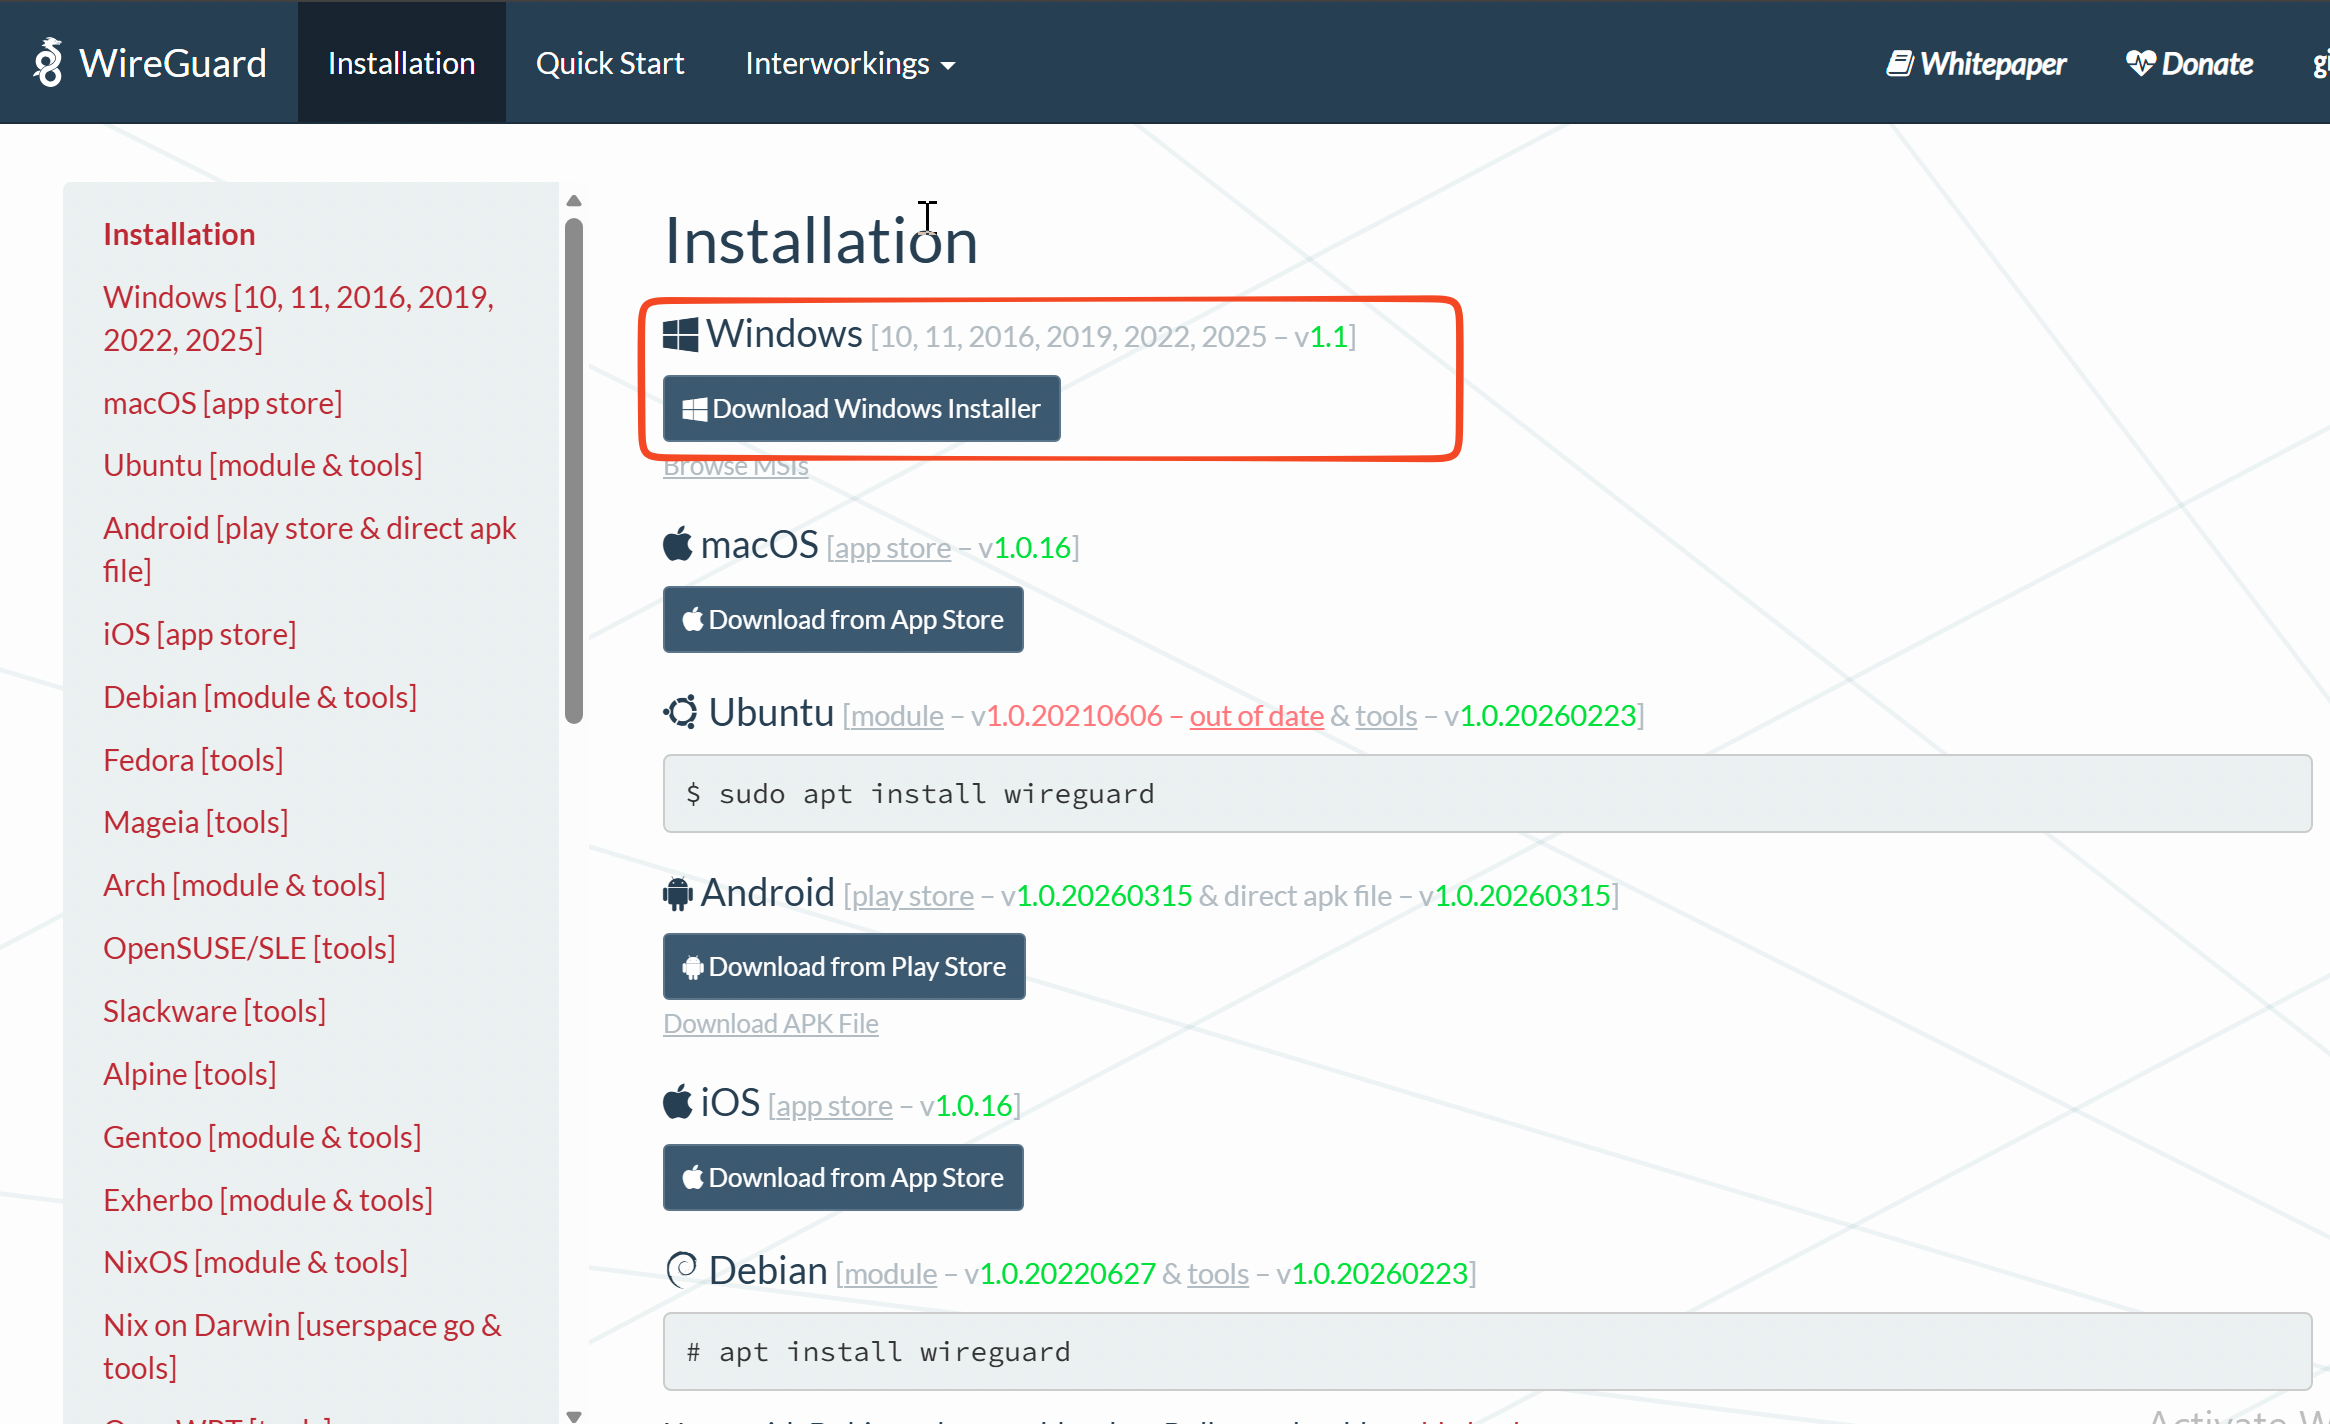
1. Install **WireGuard for Windows**: <https://www.wireguard.com/install/>
2. Open the WireGuard app.
3. Click **Add Tunnel** -> **Import tunnel(s) from file** -> select your `.conf`.
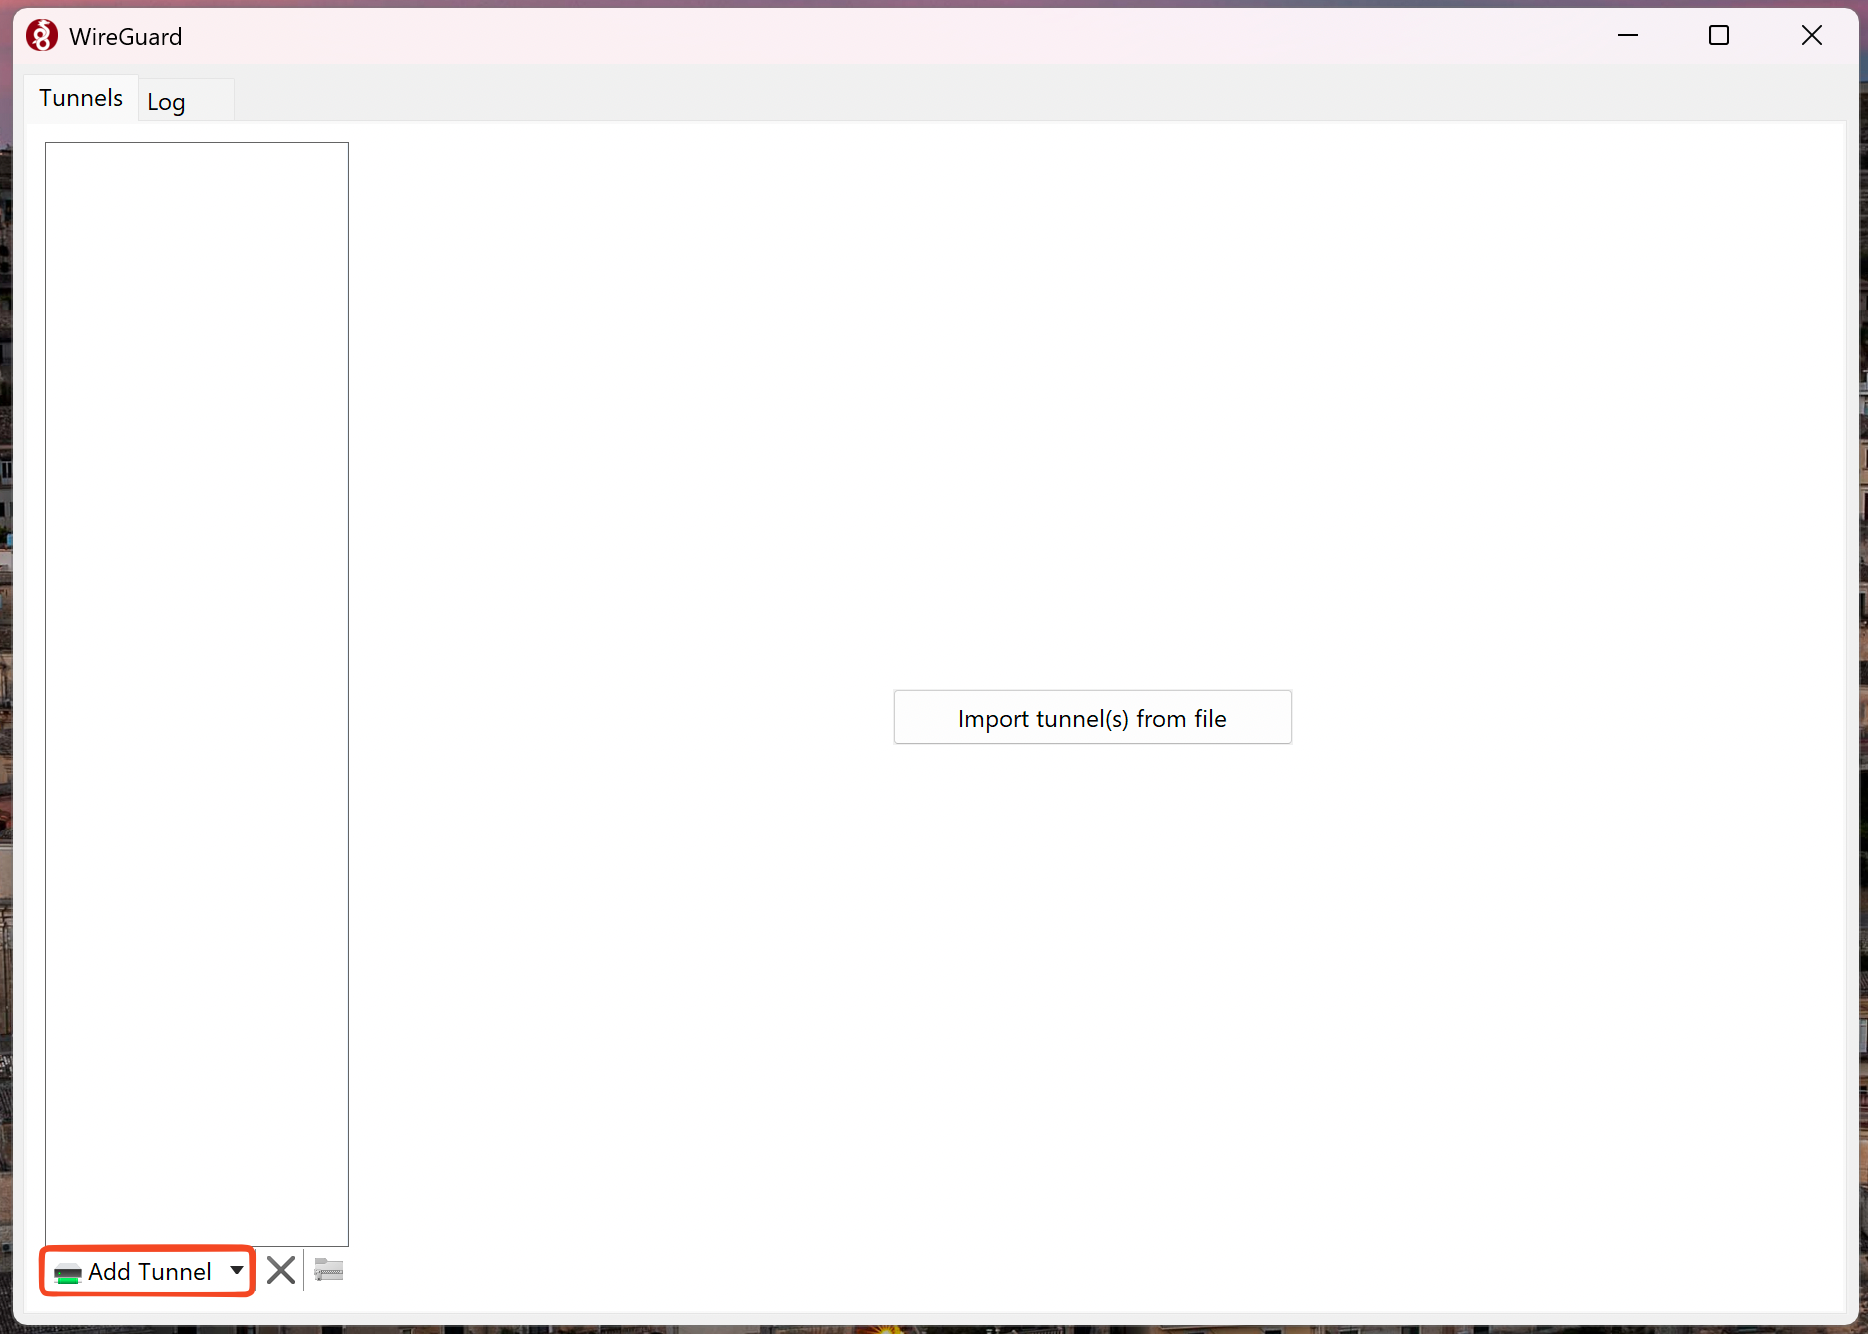
*Add Tunnel > Import tunnel(s) from file, then pick your `.conf`.*
4. Click **Activate**.
5. The tunnel shows **Active** with a **Latest handshake** time once connected.
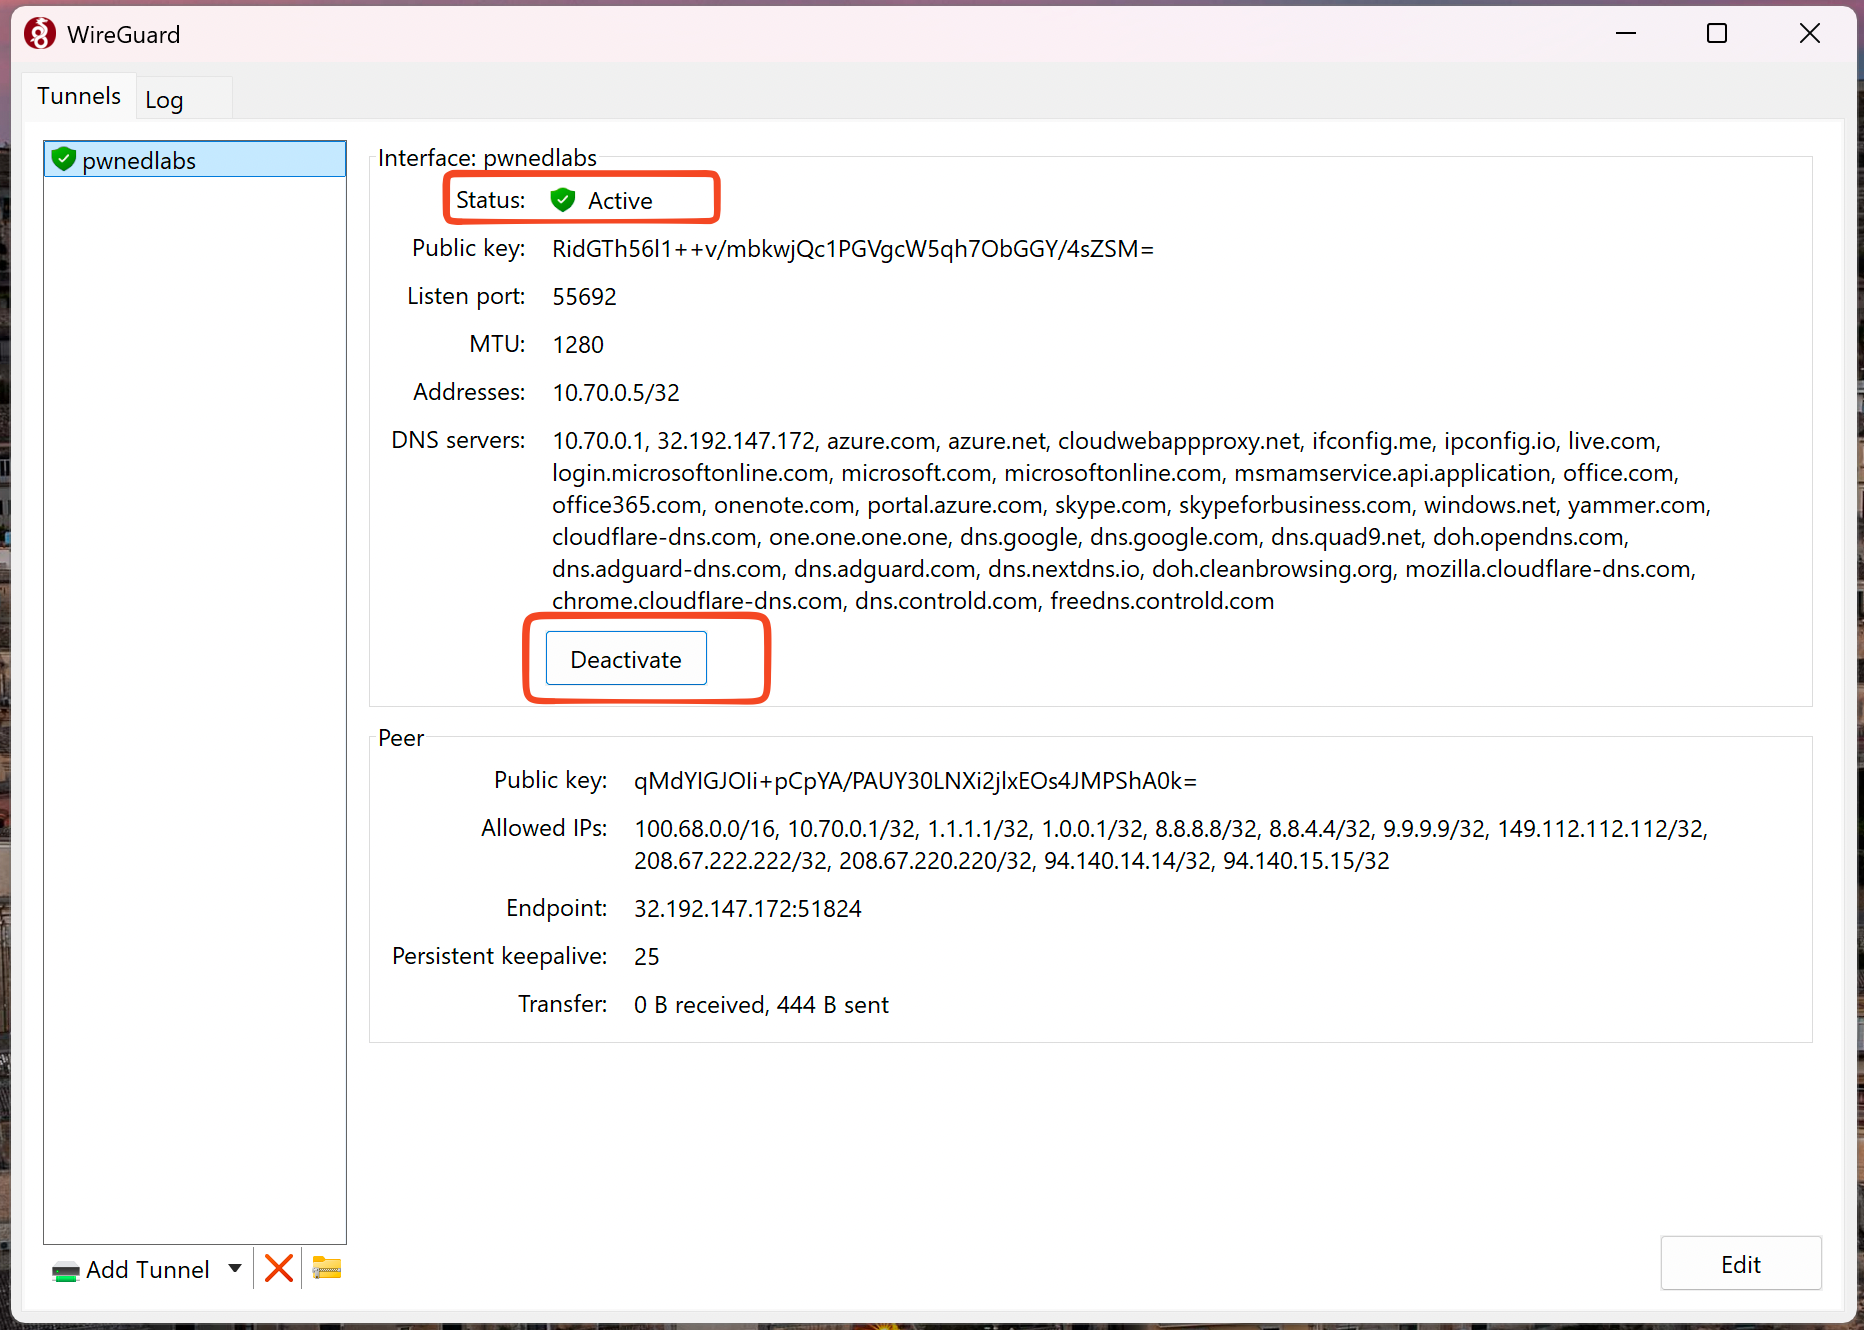
*Connected: status is Active and "Latest handshake" shows a recent time.*
To disconnect: click **Deactivate** (or remove the tunnel).
---
## 2. macOS
### Option A - GUI (recommended)
1. Install **WireGuard** from the **Mac App Store**.
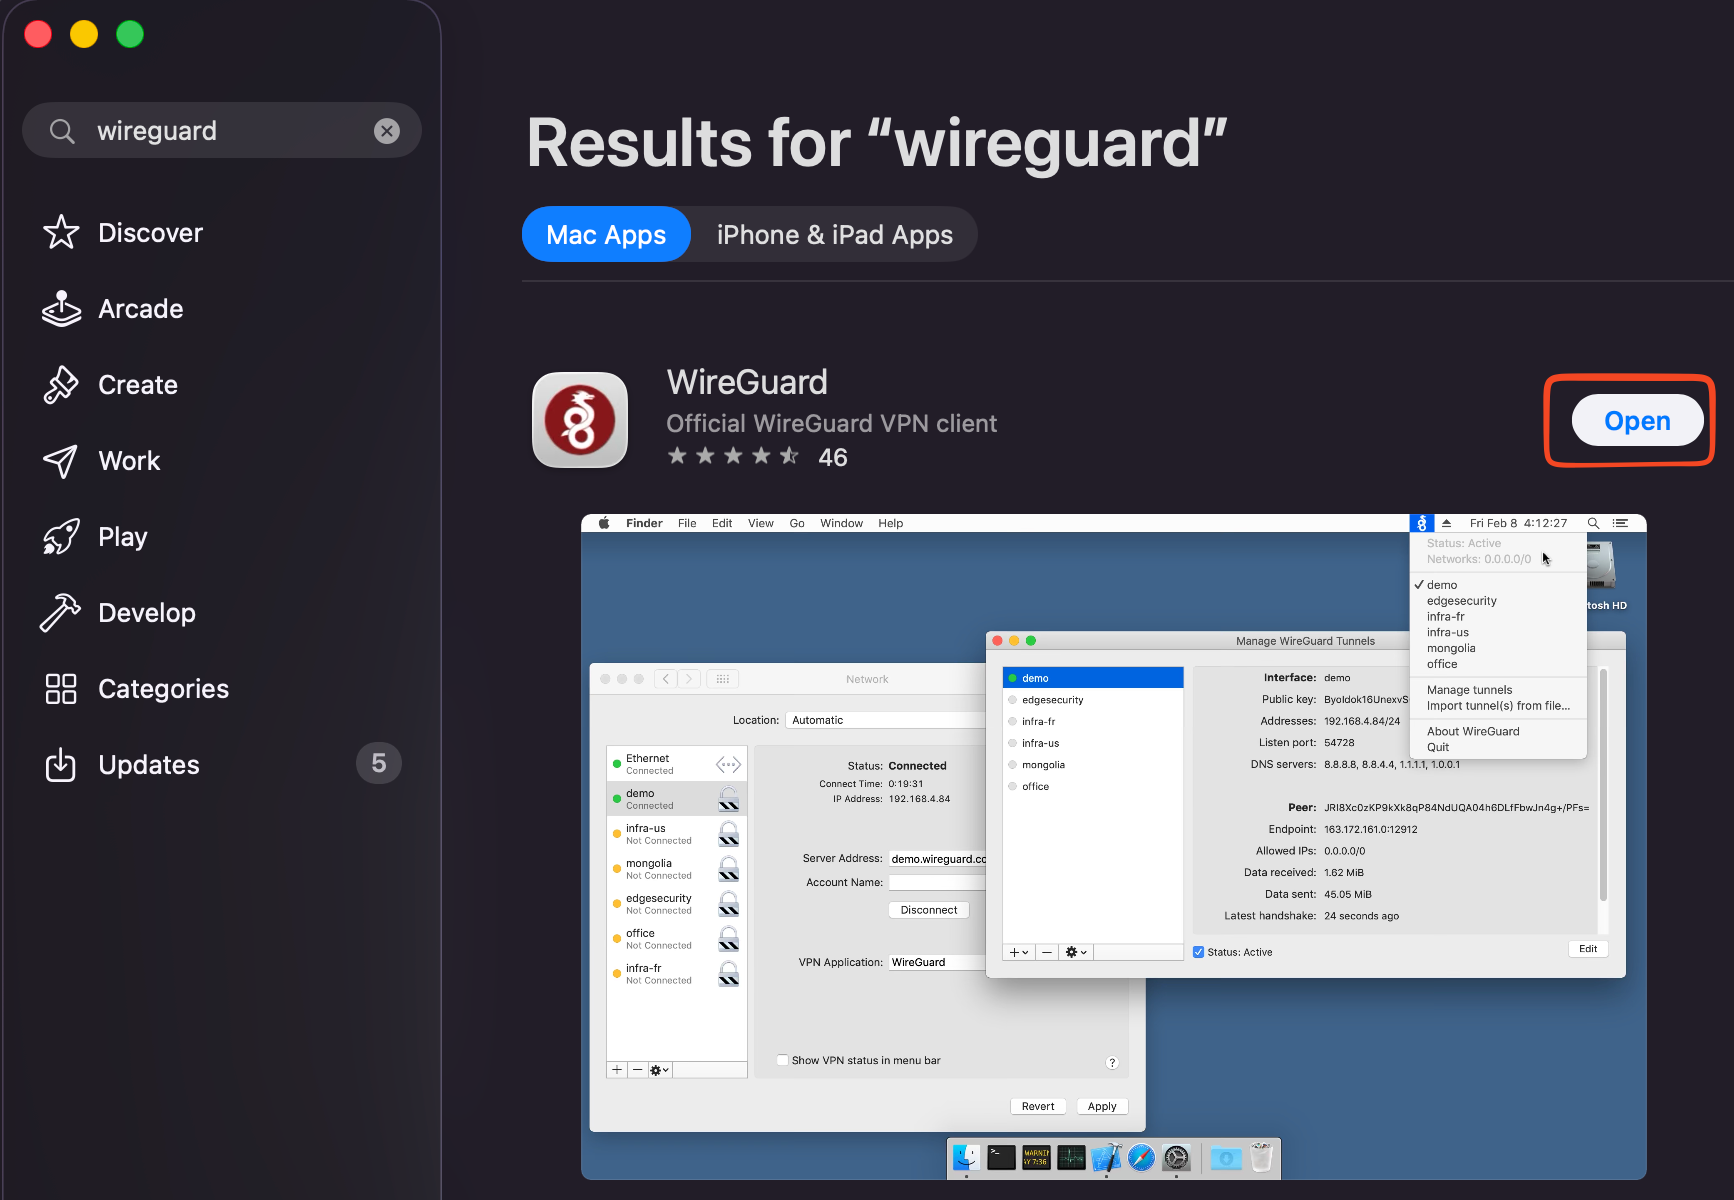
1. Open the app (menu-bar icon) -> **Manage Tunnels** -> **`+`** -> **Import tunnel(s) from file** -> select your `.conf`.
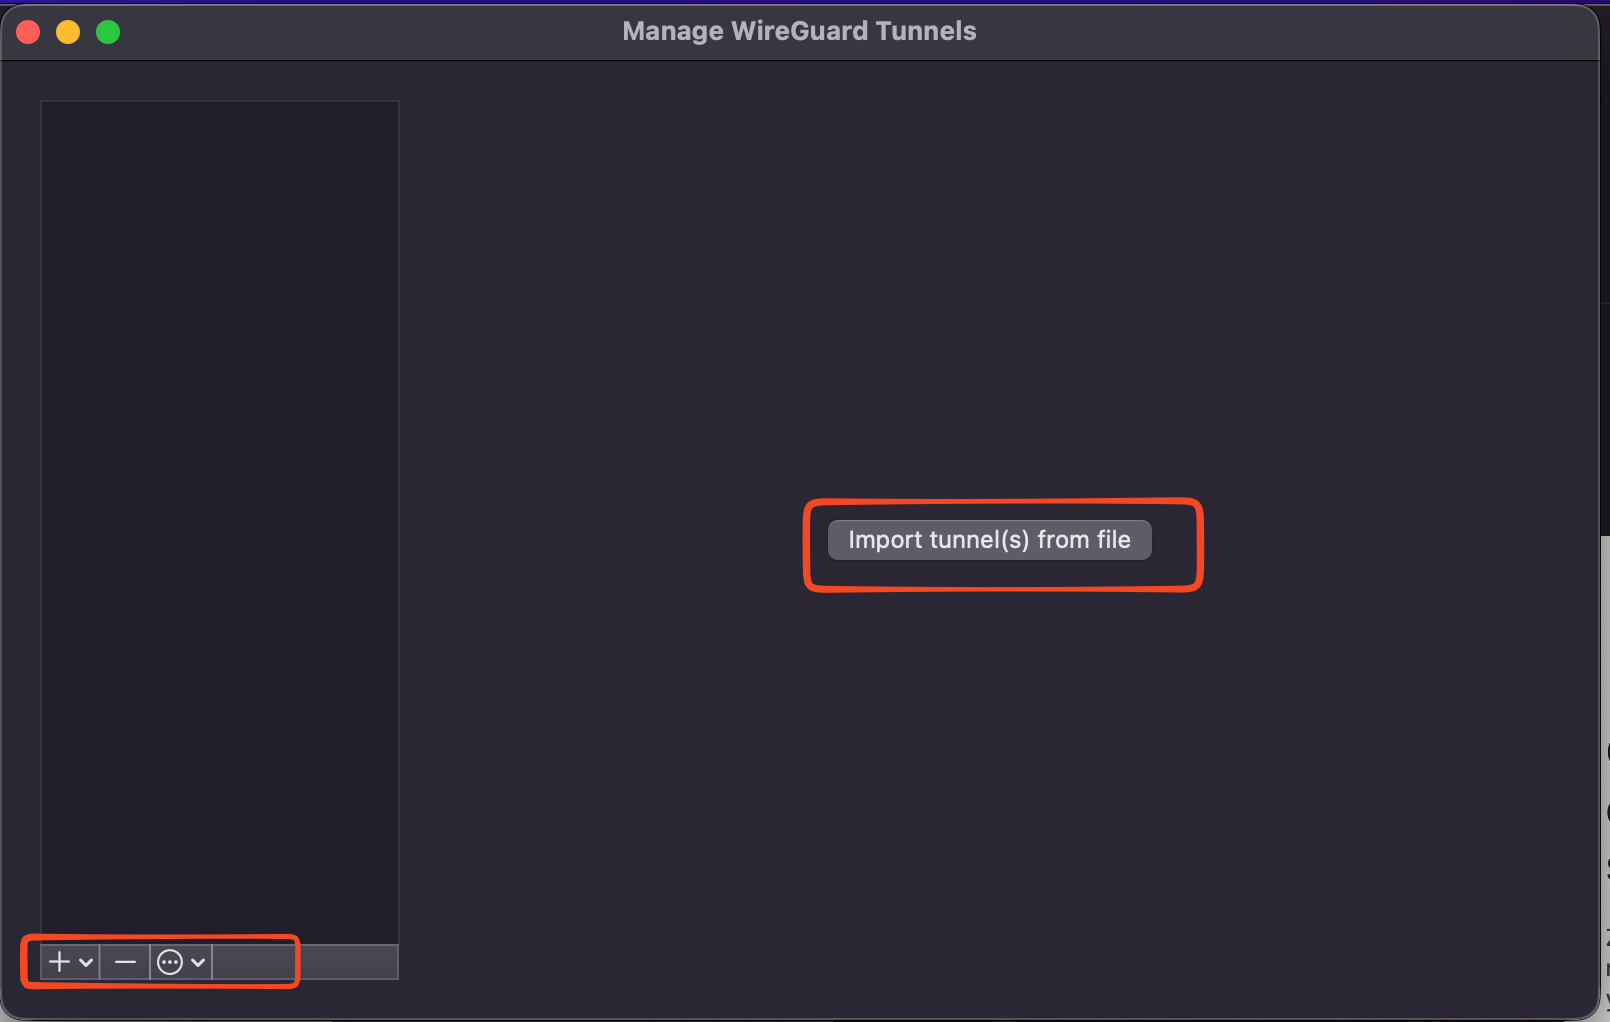
*Manage Tunnels > + > Import tunnel(s) from file.*
2. **Activate** the tunnel (menu bar or the app).
3. You'll see a **Latest handshake** time once connected.
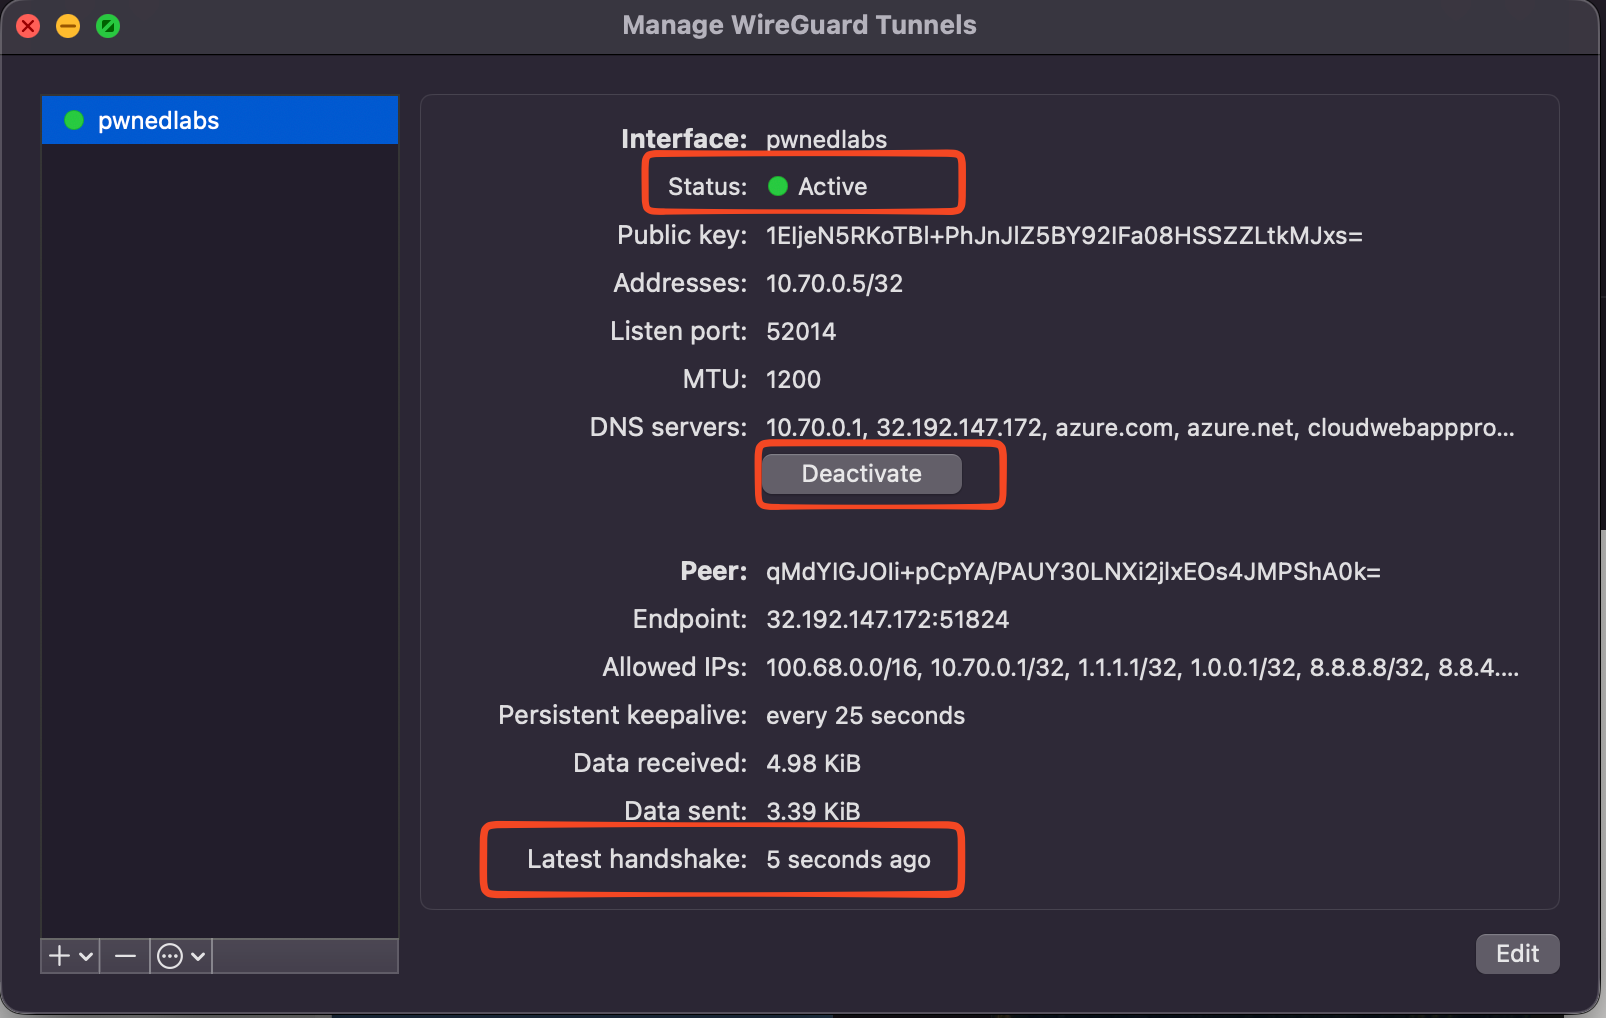
*Connected: the tunnel is Active with a recent handshake.*
To disconnect: **Deactivate** in the menu bar.
### Option B - CLI (Terminal)
```bash
# One-time: install the WireGuard CLI tools
brew install wireguard-tools
# Connect (keep the .conf somewhere safe; the interface name = filename)
sudo wg-quick up /path/to/your.conf
# Check status
sudo wg show
# Disconnect
sudo wg-quick down /path/to/your.conf
```
---
## 3. Linux
> Use the **Linux** flavor config here - not the Mac/Windows one.
> **On WSL2? Do not run WireGuard inside WSL.** The kernel Microsoft ships with WSL2 does not include the WireGuard module, so `wg-quick` and `wg` will not work there. You do not need them: activate the tunnel with the **WireGuard for Windows** client on the Windows host (see [1. Windows](#1-windows)) and it is available inside WSL2 automatically, because WSL2 shares the Windows network stack. Full steps are in the FAQ below.
### Option A - CLI with `wg-quick` (recommended)
```bash
# One-time: install WireGuard (and dnsmasq for split DNS)
sudo apt update && sudo apt install -y wireguard dnsmasq
# Bring the tunnel up (interface name = the config filename)
sudo wg-quick up /path/to/your.conf
# Check it's connected (look for a recent "latest handshake")
sudo wg show
# Bring it down
sudo wg-quick down /path/to/your.conf
```
Prefer a fixed interface name? Copy it to the standard path first:
```bash
sudo cp /path/to/your.conf /etc/wireguard/wg0.conf
sudo wg-quick up wg0
sudo wg-quick down wg0
```
---
## 4. Am I actually connected?
- **GUI:** the tunnel shows **Active/Connected** and a recent **Latest handshake** time.
- **CLI:** run `sudo wg show` - a good connection shows a **`latest handshake: ... seconds ago`** line and increasing **transfer** counters.
- **Real test:** open a lab resource you were assigned (for example the target application or cloud console for your lab) in your browser. If it loads, you're in.
> "Connected" in the app only means the network interface is up - it does **not**
> guarantee a successful handshake. Always check for a **handshake time**.
---
## FAQ / Troubleshooting
**Q: I connected but websites don't load, or the browser just spins.**
**A:** Most often you're on **Linux using the Mac/Windows config**. On Linux, wg-quick tries to push the `DNS =` line through systemd-resolved; if that's not running, it tears the whole tunnel down. **Use the Linux flavor config** (the one with `PostUp` and no `DNS =` line), and make sure `wireguard` + `dnsmasq` are installed.
**Q: I'm on WSL2 (Windows Subsystem for Linux). How do I connect?**
**A:** Run WireGuard on the **Windows host**, not inside WSL. WSL2 shares the Windows network stack, so a tunnel activated in Windows is available inside your WSL2 distro automatically. This is confirmed working.
1. Install the official WireGuard Windows client from [wireguard.com/install](https://www.wireguard.com/install/).
2. Import your **Mac/Windows** flavor `.conf` using **Import tunnel(s) from file**.
3. Click **Activate**.
4. Open WSL2 as normal. You are already connected to the VPN, so no additional steps are required inside WSL.
Do **not** follow the native Linux setup (`wg-quick`, `wg`) inside WSL2. Those steps are meant for a native Linux environment and will not work correctly in WSL2.
**Q: My public IP didn't change, is the VPN working?**
**A:** It's a **split tunnel**. Only the specific lab domains and cloud resources for your lab go through the VPN, which is a defined set in Azure, Google Cloud and AWS, not all traffic to those providers. Everything else stays on your normal connection, so your public IP won't change for general sites. Test with an **actual lab URL**, not a "what's my IP" site.
**Q: The WireGuard app says "Connected" but nothing works.**
**A:** Check for a **Latest handshake** time (`sudo wg show` on CLI). No handshake means the tunnel isn't really up, usually because your network is blocking **outbound UDP** to the endpoint's port (shown as `Endpoint = <ip>:<port>` in your config). Try a different network (or a hotspot) to confirm, and make sure a local firewall isn't blocking WireGuard.
**Q: It worked yesterday, now it doesn't connect.**
**A:** Configs are **per-user** and each new download **rotates your key**, which invalidates the previous file. Always use your **latest** config; if in doubt, ask for a fresh one.
**Q: How do I fully disconnect?**
**A:** - Windows: **Deactivate** in the app, or `... /uninstalltunnelservice <name>`.
- macOS: **Deactivate** in the menu bar, or `sudo wg-quick down /path/to/your.conf`.
- Linux: `sudo wg-quick down /path/to/your.conf` (or `sudo wg-quick down wg0`).
**Q: I'm running this inside a VM (VMware/VirtualBox), anything special?**
**A:** No. Your config already uses a conservative **MTU (1200)** so it works inside a NAT'd desktop VM. If large pages still hang, confirm you imported the correct flavor and that outbound UDP is allowed.
**Q: Can I import the same config on two machines at once?**
**A:** No, one config = one device at a time. Two devices sharing a key will fight over the connection and neither will stay up. Ask for a second config if you need two.
**Q: Still stuck?**
**A:** Contact student support and include your **OS**, whether you used the **Mac/Windows or Linux** config, and the output of `sudo wg show` (Linux/macOS) or a screenshot of the WireGuard app (Windows). See **Need help?** below.
---
## Need help?
Our student support team is happy to help you get connected.
- **Live chat:** use the chat widget on [pwnedlabs.io](https://pwnedlabs.io).
- **Discord:** [discord.gg/pwnedlabs](https://discord.gg/pwnedlabs).
- **Email:** [hi@pwnedlabs.io](mailto:hi@pwnedlabs.io).